This tutorial shows how I assembled the climbing rose in my fantasy graveyard scene. The process can probably be re-purposed to also produce other similar shaped plants, such as grape vines or trained fruit trees.
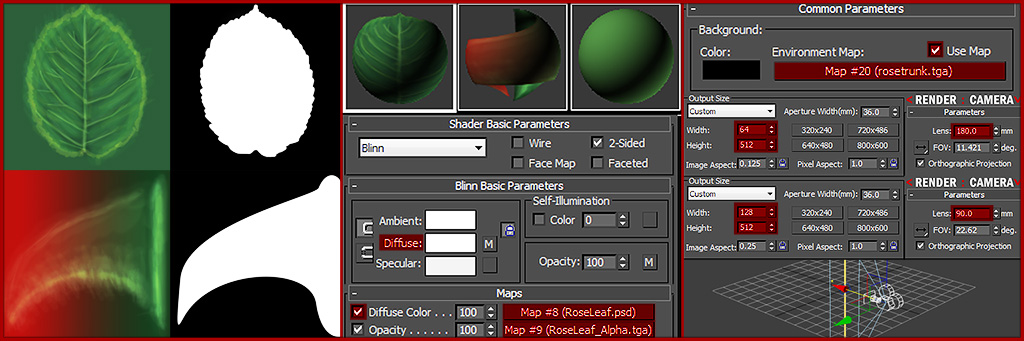
1) First create the textures needed for the bulk of the rose, in this case a leaf and a thorn.
2) In Max, set up your materials by plugging in your diffuse and alpha for each component. The third material is for the stem, there I used a small texture filled with a colour
picked from the leaf. Give each material a completely white diffuse, that way we can use the plain white to render an alpha map by also putting the self-illumination up to
100%.
3) Create a cylinder at 0,0,-64 with a radius of 0.5 and a height of 128. Apply your stem material.
4) Now to set up what we will need for the renders. First put the texture used for the trunk into the Environment Map and set the colour to black. This is again for
rendering the Alphas. It is quicker to toggle the map off/on each time than it is to swap colours. Also add a camera to your scene with the target positioned at 0,0,0 and
the camera at 40,0,0. To set the camera for our renders, first make sure Orthographic Projection is toggled. For a render of 64x512 (used for the bare thorny stem) use a
180mm lens and for 128x512 (used for the stem with leaves) use a 90mm lens.
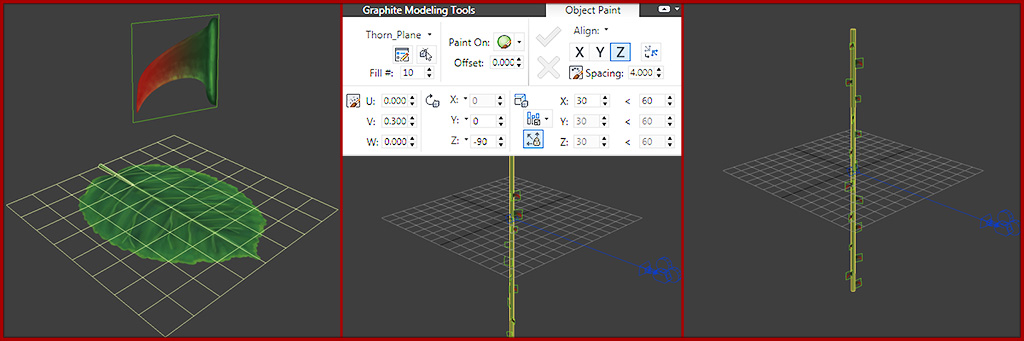
5) Create 2 planes, 1 larger and 1 smaller, and apply your leaf and thorn texture. Make sure the leaf plane has enough divisions to allow us to apply deformations to shape
our leaves later. Also add a cone to the base of the leaf for a stem, make sure it lines up with the divisions on your plane.
6) Lets make our stem sharp. Use object paint to liberally coat your stem with the thorn plane.
7) Manipulate the randomly placed thorns so they face the camera for rendering.
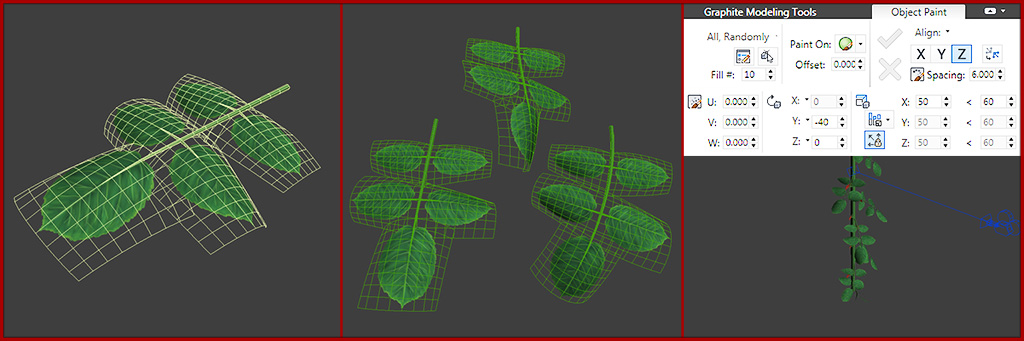
8) Now to create our branch. Create another cone that will serve as the stem of our branch and duplicate the leaf we created earlier around the stem. Duplicate this flat
branch and save the original for later. On each separate leaf apply a mixture of bend, twist and taper modifiers to the duplicate until each leaf is shaped in a way you like.
9) Group all these leaves to the branch stem, and then repeat the modifier process to the whole branch object. Create a couple of variations so your branches don't end
up too repetitive.
10) Just as with the thorns use Object Paint to first randomly spread your branches along your rose stem. Then go in afterwards and manipulate them so that they all face
the camera. You can enable Show Safe Frames (Shift+F) with the correct camera render setup so you can make sure they fit inside your render space.
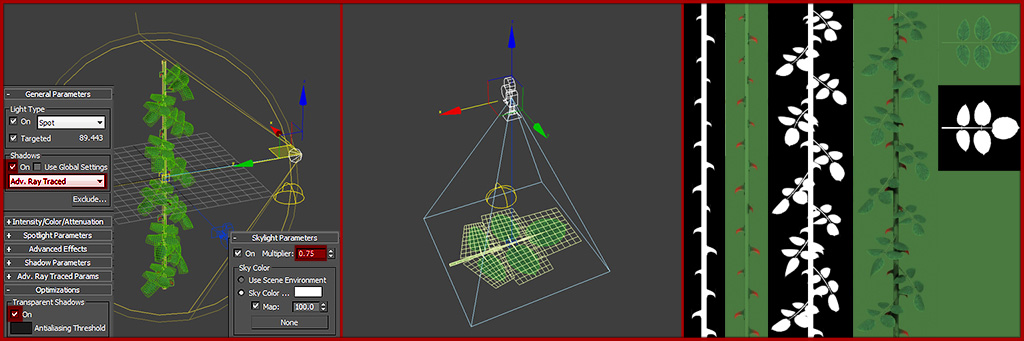
11) Because we want this underlying branch texture to have volume, even though its going to be flat, lets also bake some lighting into it. Add a spotlight to the scene,
target at 0,0,0 and the spotlight itself at 80,0,40. Set it to white with 0.5 intensity, enable shadows using Adv. Ray Traced, and under Optimisations turn on Transparent
Shadows. Turn on Light Tracer under Advance Lighting in the Render Setup window.
12) Add a camera above the flat branch we put aside earlier so we can render a branch texture. Use the same lighting so the renders match.
13) Render out all the different maps we need for the textures. Use the camera settings discussed in part 4. For the alphas toggle off the diffuse maps in the materials
and put self-illumination up to 100%, also toggle the environment map to black. For the branch I set the render to 128x128.
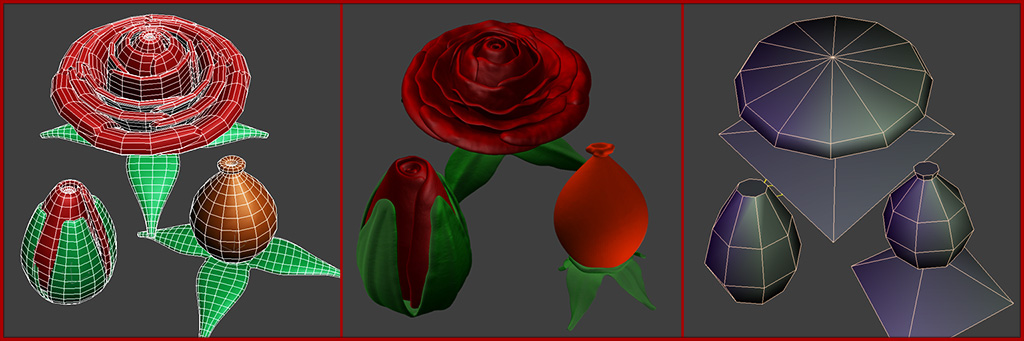
14) The next component needed before we can assemble the complete rose bush is the flowers. Create base meshes in max for a flower, a bud and a rose hip. Take these into mudbox to quickly add some detail and refinement to the shapes. Lastly create the low poly meshes back in max. You could skip the mudbox stage and start with the low poly and completely hand paint the textures if you prefer.
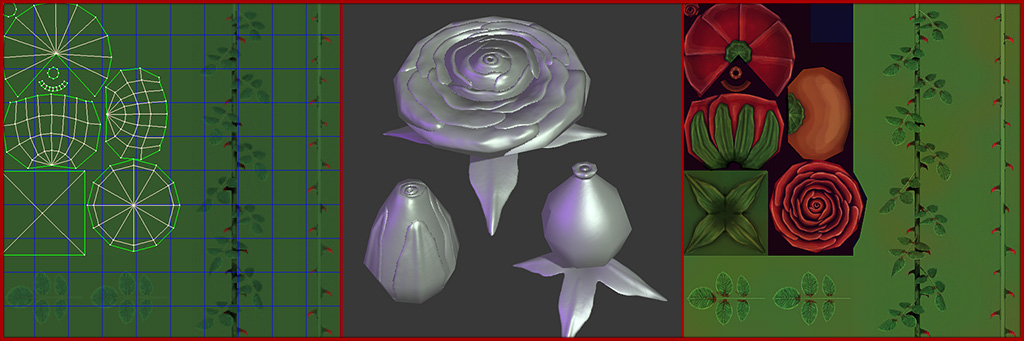
15) Arrange the rose components we rendered out in step 13 into a sheet leaving enough empty space for our flower components. Unwrap the low poly flower
components to this empty space and bake out normal and AO maps, if you chose to do high poly models for them. Repeat the process with the Alpha maps.
16) The last process on the texture is to paint the flower components. At the same time I also added some colour and overall variation to the rendered branches and stems.
Now we are at the point where we can begin to assemble our rose plant.
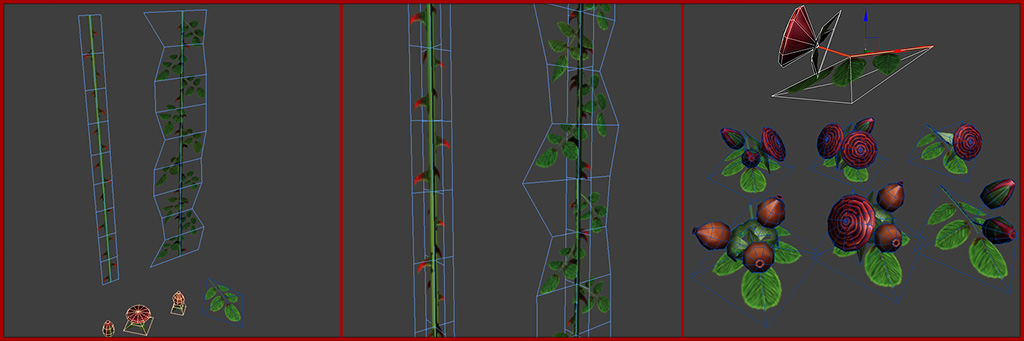
17) Create a new scene with all the separate components. Create a couple of poly strips for your rose steams, make sure you include enough loops so that when you
deform these strips along a path the curves are not too harsh and your texture doesn't deform too much. Also create a plane for the branch.
18) Duplicate the bare thorn strip and rotate it by 90 degrees to the original. Adjust its UVs so that the thorns arent noticeably duplicated. Make another copy of this
strip and move it across to the leafy stem. Then stack a few copies of these stem sections on top of each other to increase their length.
19) Our last piece of setup is to add our flowers to the branches. For this create a poly strip that uses the stem of the branch texture so that the flowers arent floating in
space above each branch.
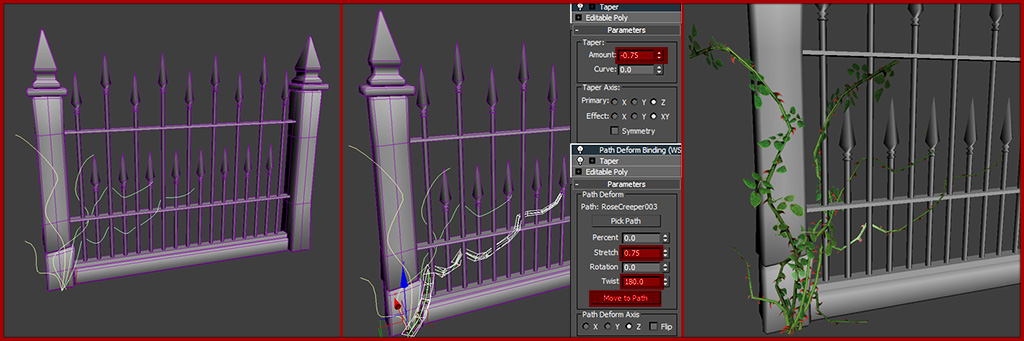
20) Import the mesh you wish for you rose to climb over. In my case it was the graveyard railings. Create a series of lines around your object where you want the rose stems.
22) Duplicate one of your stem strips. Apply a taper modifier with an amount of -.075 so that it doesn't end up too pinched. Next apply a World Space Path Deform
modifier and pick one of your lines as the path. Click Move to Path to snap your stem to the line. Decrease the stretch as needed to get smooth curves, apply a twist of
180 degrees. Finally trim off any unneeded polygons that extend beyond the required stem length.
23) Repeat this process for every stem. Use the leafy stem strips where you want the densest part of your rose to be.

23) Now we can start adding some volume to the rose plant using our branches. Using Object Paint brush from the tip of each branch to the base. Using the Ramp Scale
means branches at the end of the stem will be smaller.
24) Improve the placement and rotation of these branches by hand. Repeat this process for each stem.
25) Lastly using the same settings as for the bare branch, but with all of your flower branches added to paint randomly, use the same methods to paint flower branches on
the leafy stems. Again adjust these new branches by hand for the most pleasing composition. As a very final step go in and delete any branches that are overlapping, and
duplicate a branch or two if there are any gaps to fill.
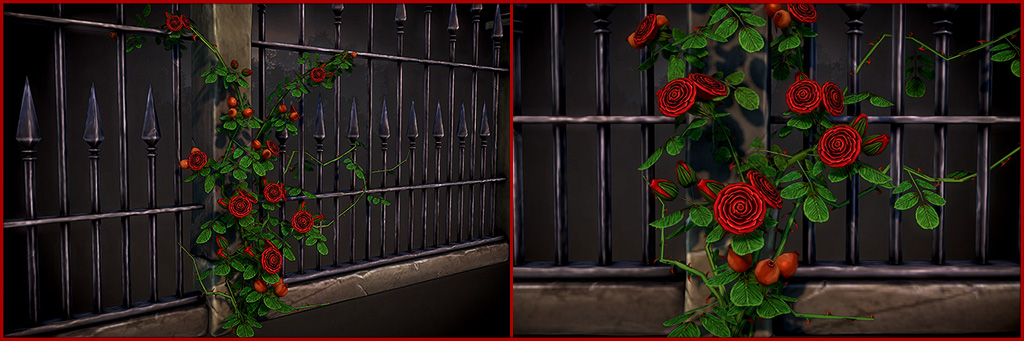
Heres a couple of shots of the final model in Marmoset. I have also created specular and gloss maps for the flowers.